
Skip Shop + Pay is here, giving you a new way to shop and deliver everyday items. Below, you’ll find everything you need to get started, from identifying offers in the app to shopping for grocery, pharmacy, and alcohol items, and paying with your Skip payment method. Check it out.
Check it out.
Getting started
- First, opt-in to Shop + Pay.
- Next, you will receive an email to activate your Skip Visa Prepaid Card to start accepting orders.
- Check the status of your Skip Visa Prepaid Card after reading the steps below by heading to the Help Centre.
Adding Card to Wallet
1. Open the Profile Tab.
Open the Profile Tab by clicking the Profile button at the bottom of the App.
2. Click the Gear icon.
Enter the Settings page by clicking the Gear icon ⛭.
3. Click Shop + Pay
Enter the Shop + Pay page by clicking the Shop + Pay option


4. Click My Payment Card
Enter the page by selecting My Skip Visa Prepaid Card.
5. Add card to wallet
Tap Add to Apple Wallet or Add to Google Wallet.
You will then be redirected to your wallet, and your payment card will be added.
You are now ready to receive orders.

Accepting orders
- When you receive a new offer, look for the Shop + Pay tag. You’ll be able to preview the list of items in the order.
- Accept a Shop + Pay order to begin the delivery.

Getting to the store
- To begin the delivery, tap on Navigate to business and view store details and location.
- You can view any notes from the business such as parking instructions at the top of the screen.
- You can get more information about the order, like what items you will be shopping for, by swiping up.
- Once you’ve arrived at the store, tap I’ve arrived on your phone screen.

Shopping for items
- Tap Start shopping to kick things off.
As you scan items, they’ll move from the To Do tab to the Done tab. - Tap an item to view details like size, quantity, or where it’s located in the store. You might be shopping for anything from toothpaste to potato chips to six-packs.

Found it?
Tap Scan item barcode and point your camera at the barcode. Once scanned, the item moves to Done.
Need to adjust the quantity?
Go to the Done tab, tap the item, then Update quantity.

Handling weighted items
With the introduction of weighted Items to Shop + Pay, some orders may now include items such as fresh produce or meat that require weighing. Here’s how to handle them:
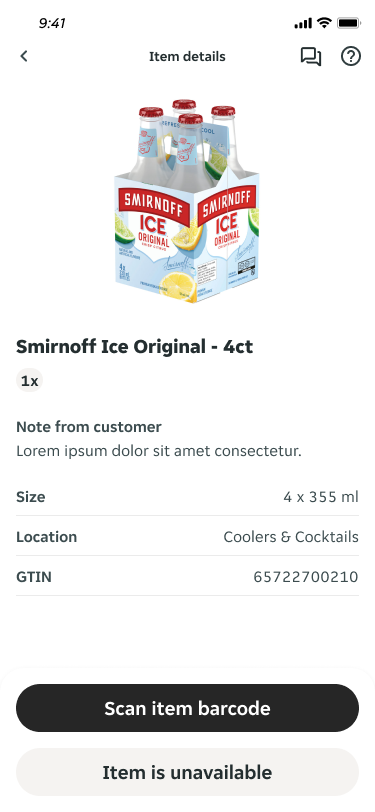
- Identify weighted items: Look for items labelled Weighted Item in your shopping list.
- Locate the Item: Tap the item to view details such as quantity, requested weight, and store location.
- Scan the Item code: Follow the on-screen prompt to scan the item’s barcode or enter the PLU (Price Look-Up) code for fresh produce (you can also find the PLU on the shelf tag). If the item has a different PLU code than what’s shown in the app, take a clear photo. This will allow the system to register the item, then continue shopping.


- Weigh the Item: Use a store scale to weigh the item. If it’s pre-packaged meat or deli items with embedded labels, enter the weight as listed on the label.
- Enter the weight: Input the final weight into the app. The app allows up to three decimal places (e.g., 2.011 kg). For multiple items, enter the quantity picked, and then you can either enter the total weight or the individual weights of each item.
- Checkout: Once all items are picked and weighed, they will move to the Done Items list. At that point, the checkout button will become available, allowing you to proceed with payment.


What you need to know
- Always check produce quality and expiration dates.
- Scales are usually in the produce section. Ask a store associate if you can’t find one.
- Stay within 25% of the requested weight (e.g., 1 kg request = 0.750–1.250 kg allowed).
- For pre-packaged meat or deli items, enter the exact weight from the label.
- If you can’t find the exact item, check the barcode carefully. If it’s still not available, ask a store associate or mark it out of stock.
- If a barcode doesn’t scan, confirm the item is correct and follow the app’s prompts.
- If an item is overweight at checkout, ask the associate to remove some before re-weighing.
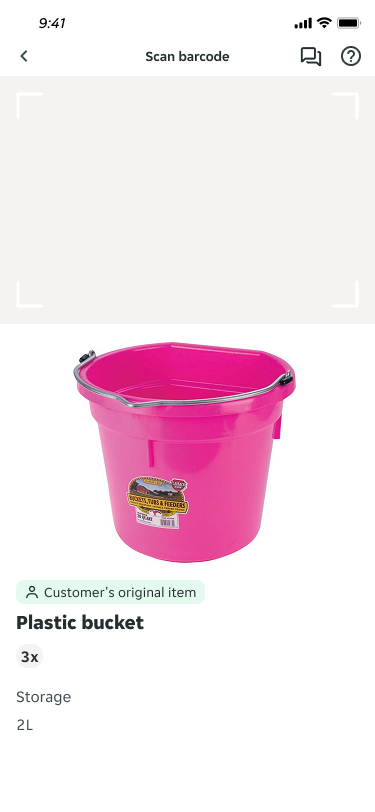
What to do when the exact item isn’t there.
Sometimes a product on the list isn’t exactly what you see on the shelf, and that’s totally okay. Depending on the situation, there are two simple ways to move forward:
1. For items with shared barcodes (e.g., at Dollarama)
Some larger stores, especially Dollarama, have products that come in different colours, designs, or flavours, but all share the same barcode.
Example: A pack of stickers that comes in stripes, polka dots, or animal prints — all under the same barcode.
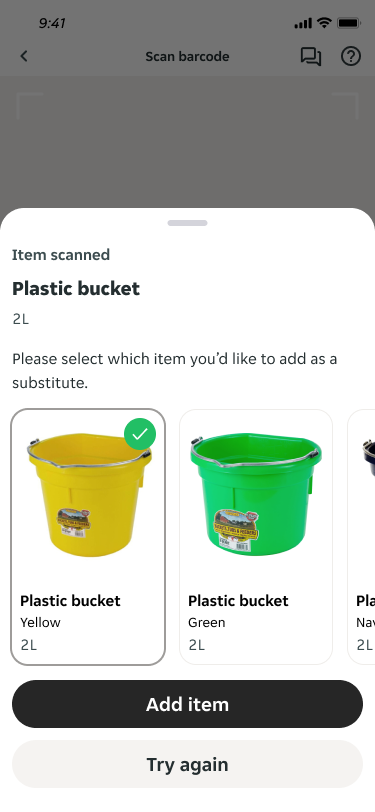
In these cases:
- You don’t need to suggest a substitution.
- Just scan the item that matches best with the customer’s original request (choose the most neutral or popular variation if unsure).
- The barcode will still work, and you can move on to the next item.
OR
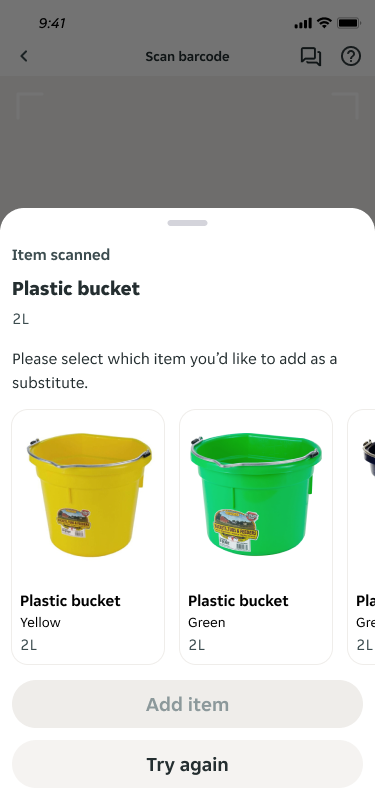
2. When you need to suggest a real substitution
If the item is completely out of stock and no shared barcode version is available, you can suggest a substitution.
Here’s how:
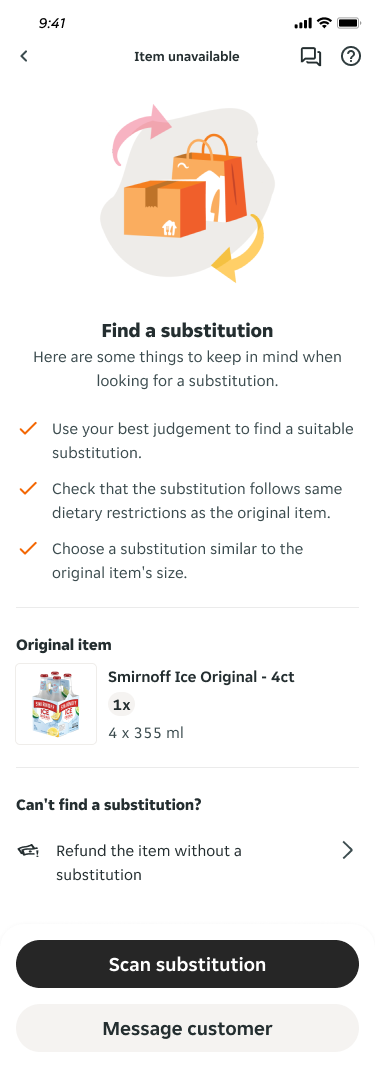
- Tap Item is unavailable under the scan button.
- Read the quick instructions that pop up.
- Choose one:
- Tap Scan Substitution to scan the item you picked as a replacement.
- Tap Message Customer to chat with the customer if you’re not sure what they’d prefer.
- If you can substitute an item, the suggested item moves into the Pending tab for customer approval.
- You’ll get a notification when the customer responds:
- Approved = item moves to Done.
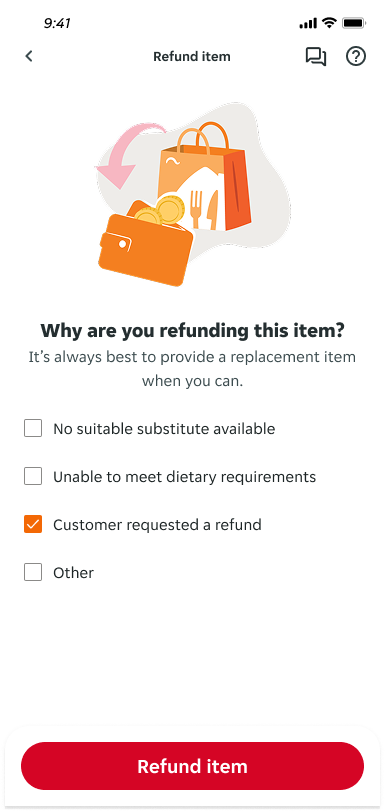
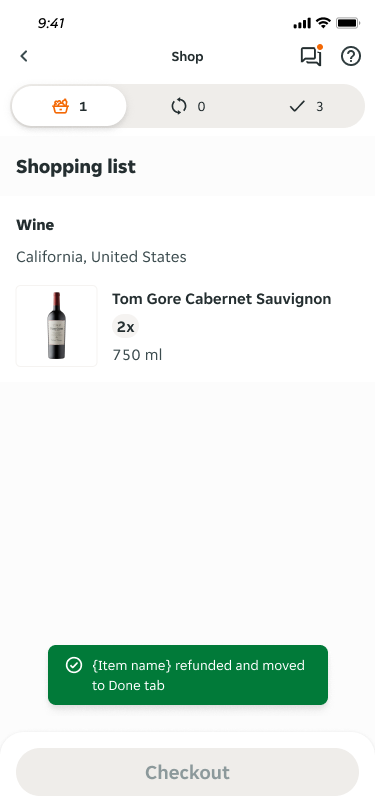
- Rejected = item gets refunded.
Want to make changes before checkout? No problem, you can update items in the Pending or Done tabs. Just keep in mind that any changes need customer approval again.
Important: If any items are still pending when you’re ready to check out, a 2-minute countdown will start. Once time’s up, those items are refunded automatically.
3. When you need to suggest a substitution for a weighted item.
If a weighted item like produce or meat is out of stock or not up to standard, you can suggest a substitution.
- Tap Item Unavailable and select Add Substitution.
- Choose a similar item and scan or manually enter the PLU code.
- Weigh the new item and enter the correct weight in the app.
- The customer is notified instantly and can approve or decline while you continue shopping.
Tips for success
- Barcode issues: If a product’s barcode doesn’t scan, and you’ve confirmed that you have the right item, follow the app prompt and take a photo of the item to proceed.
- Bagging items: Always use a bag for Shop + Pay orders. If the customer didn’t request a bag, you must use your Skip Visa Prepaid Card to purchase one at the store as part of the same order before scanning the Skip card.
- Customer communication: If an item is unavailable, you can suggest a substitution or message the customer for approval.
Checking out
- Once you’ve finished shopping, tap Checkout and head to a regular checkout lane with a cashier (self-checkout at Walmart). The app will ask you to confirm you’re ready. Tap Continue to proceed.
- Tap “I’m at a cashier” once you arrive. This unlocks access to your phone’s wallet and the Skip Visa Prepaid Card.
- Use only the Skip Visa Prepaid Card for payment:
- If you need to buy bags, add that to the order before scanning your Skip card.
- Do not use personal debit, credit, or rewards cards (e.g., PC Optimum, LDExtras).
- Lost your phone or accidentally deleted your Skip card? Contact Courier Support via the Courier Support Webform right away to request a replacement. If you’re switching or upgrading devices, remove the card from your old phone and add it to the new one before accepting Shop + Pay orders.
- Use cashier checkouts whenever available. Some retail partners require cashiers to scan loyalty barcodes or enter tax IDs.
- At Walmart, you must use self-checkout. It’s the only approved option for Shop + Pay orders.
- After payment: Keep the receipt until delivery is complete, but don’t put it in the customer’s bag. The customer will receive their copy via the app.
- Once ready, tap Proceed to delivery.

Delivery
- Tap Deliver order and you’re ready to make your way to the customer. Once you arrive at the customer’s location, review the delivery notes for their dropoff instructions.
- You’ve reached the end of the Shop + Pay journey. You’re ready to hit the road and make a Shop + Pay delivery!

If you have any questions or need support, don’t hesitate to reach out using our new Shop + Pay Support Form